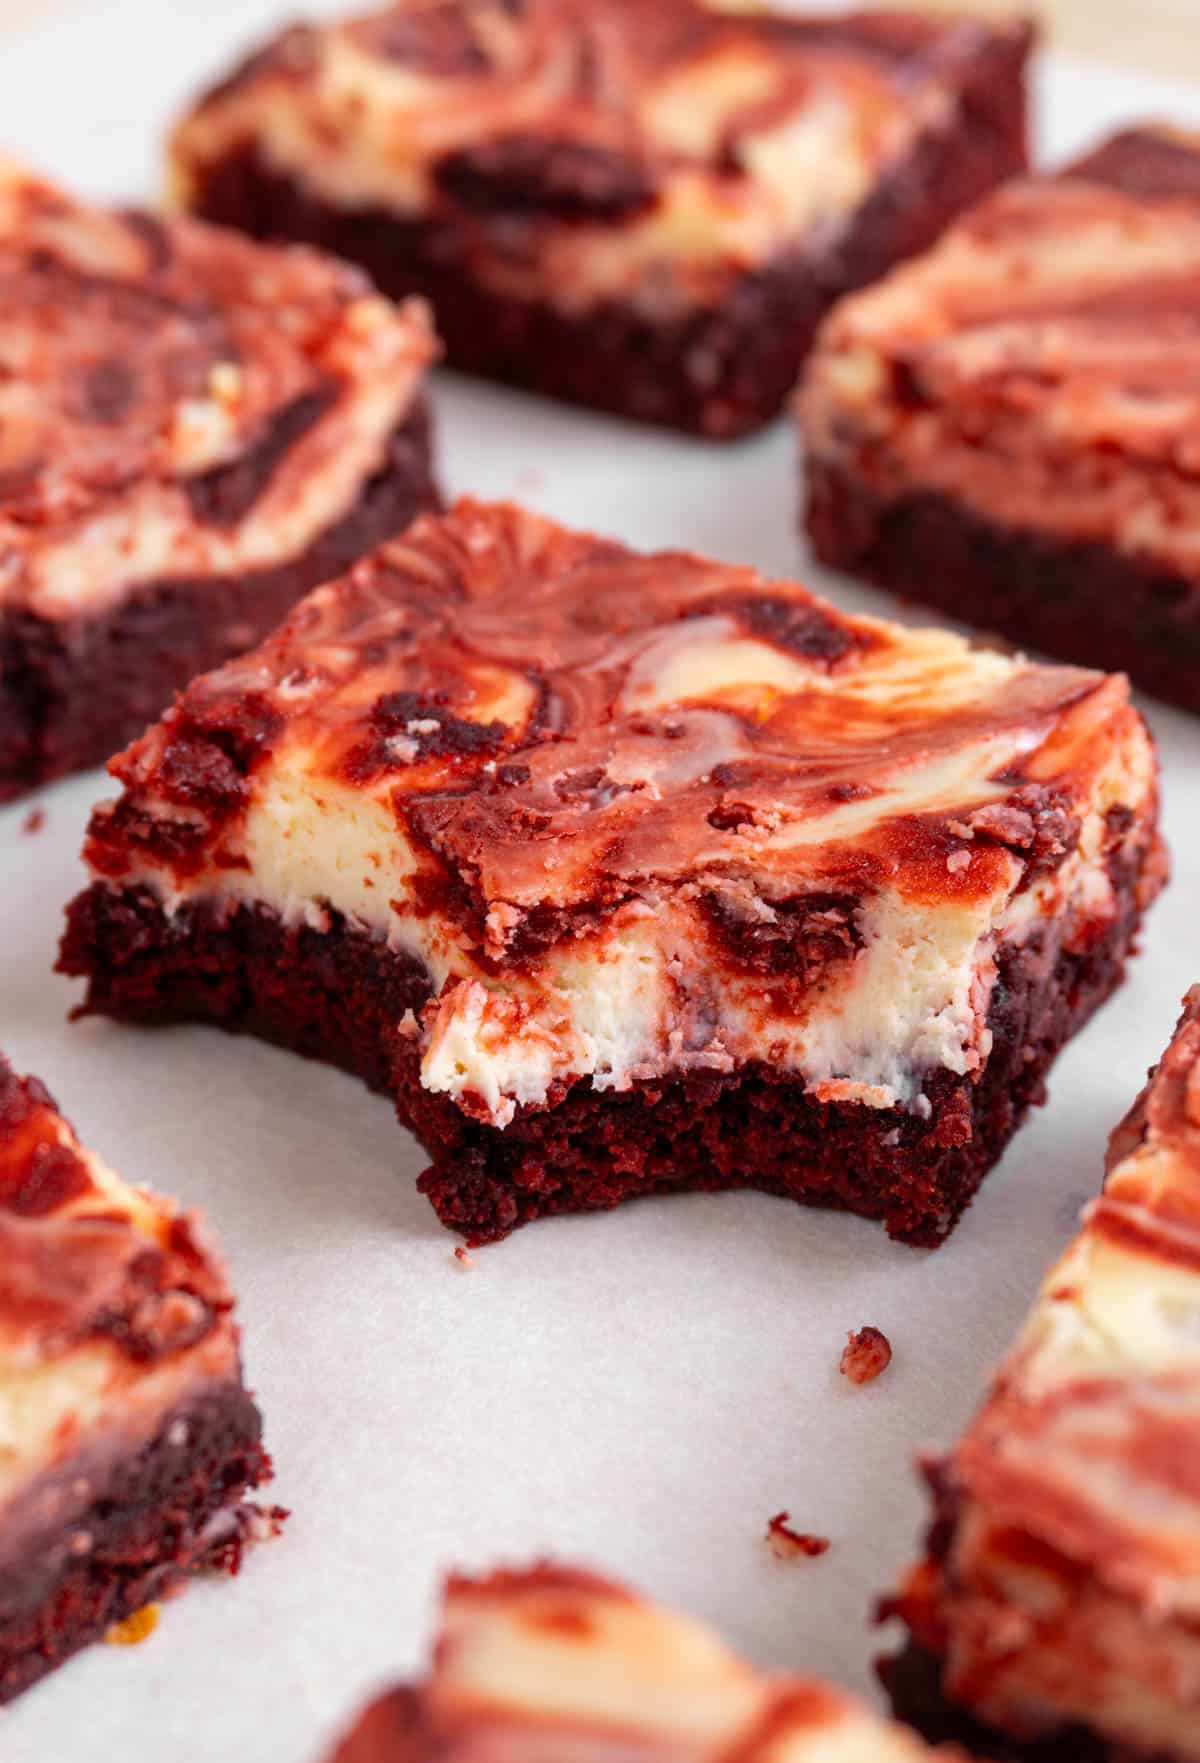
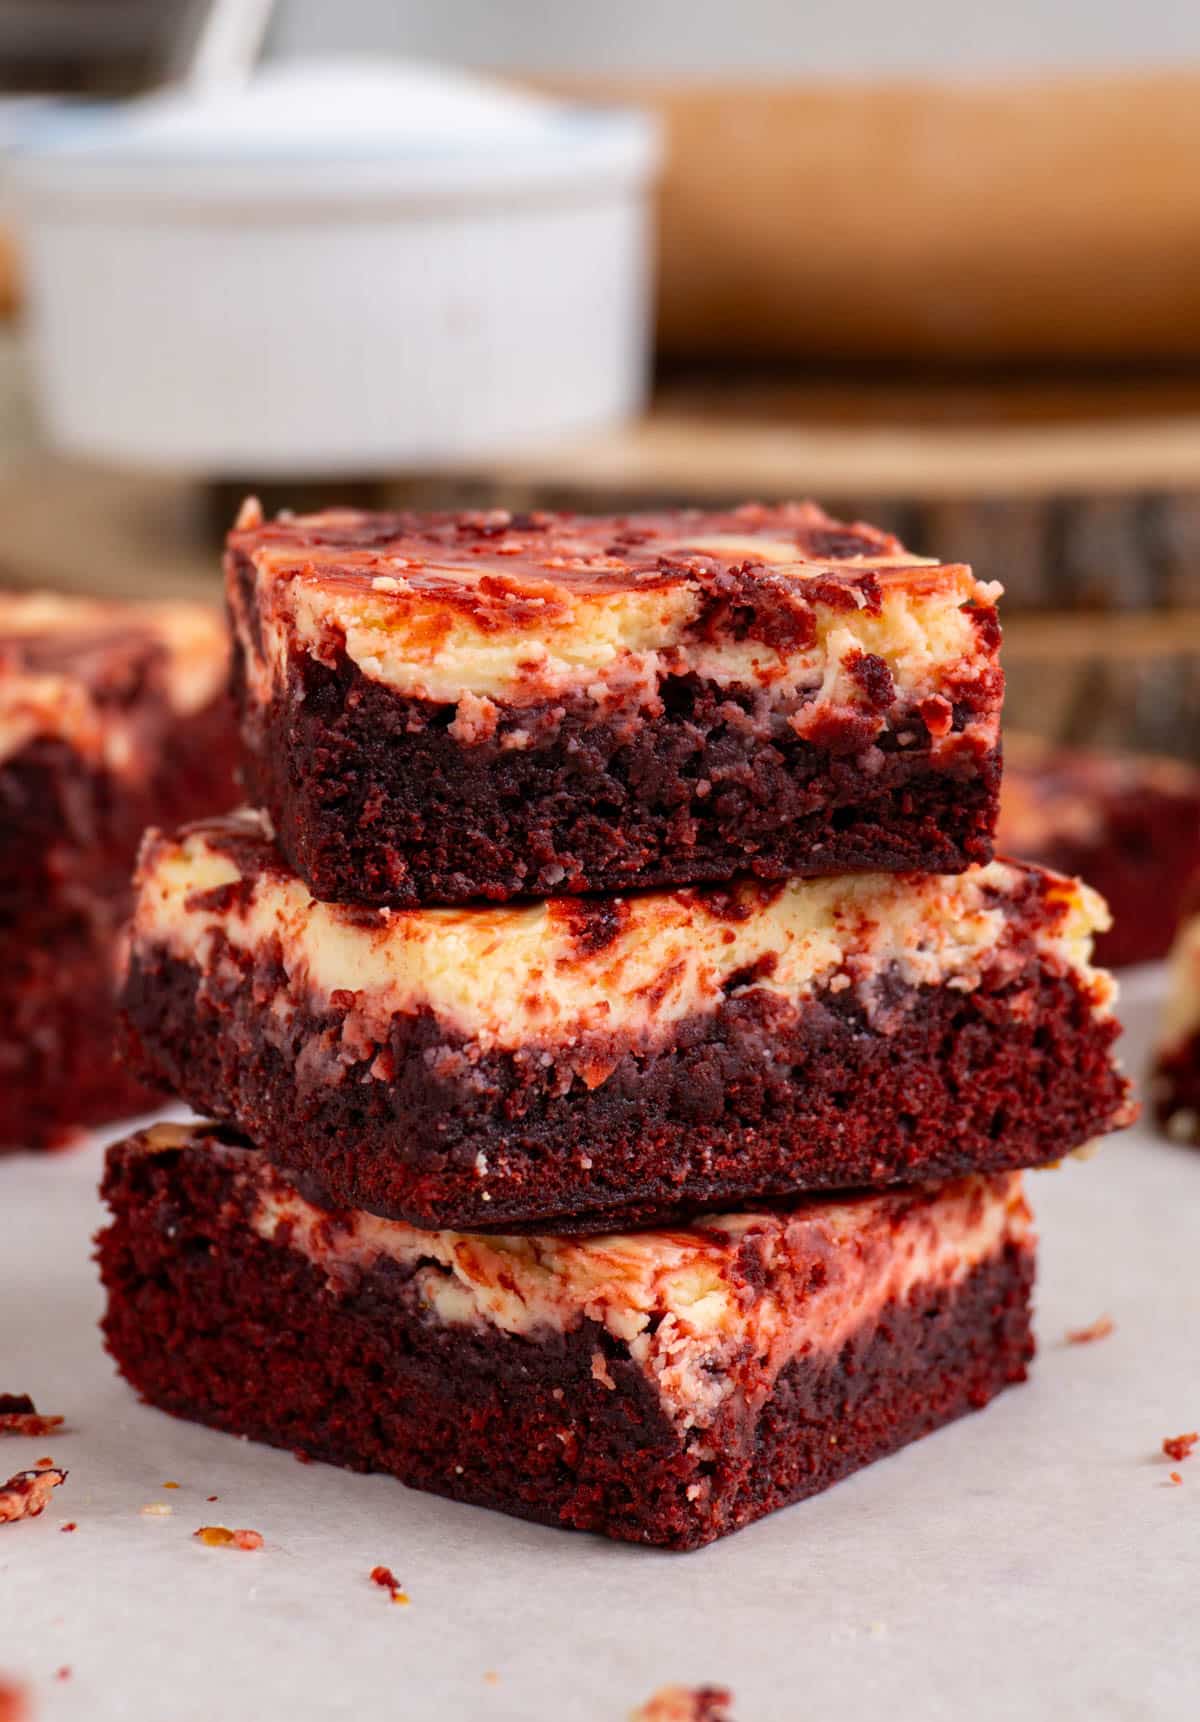
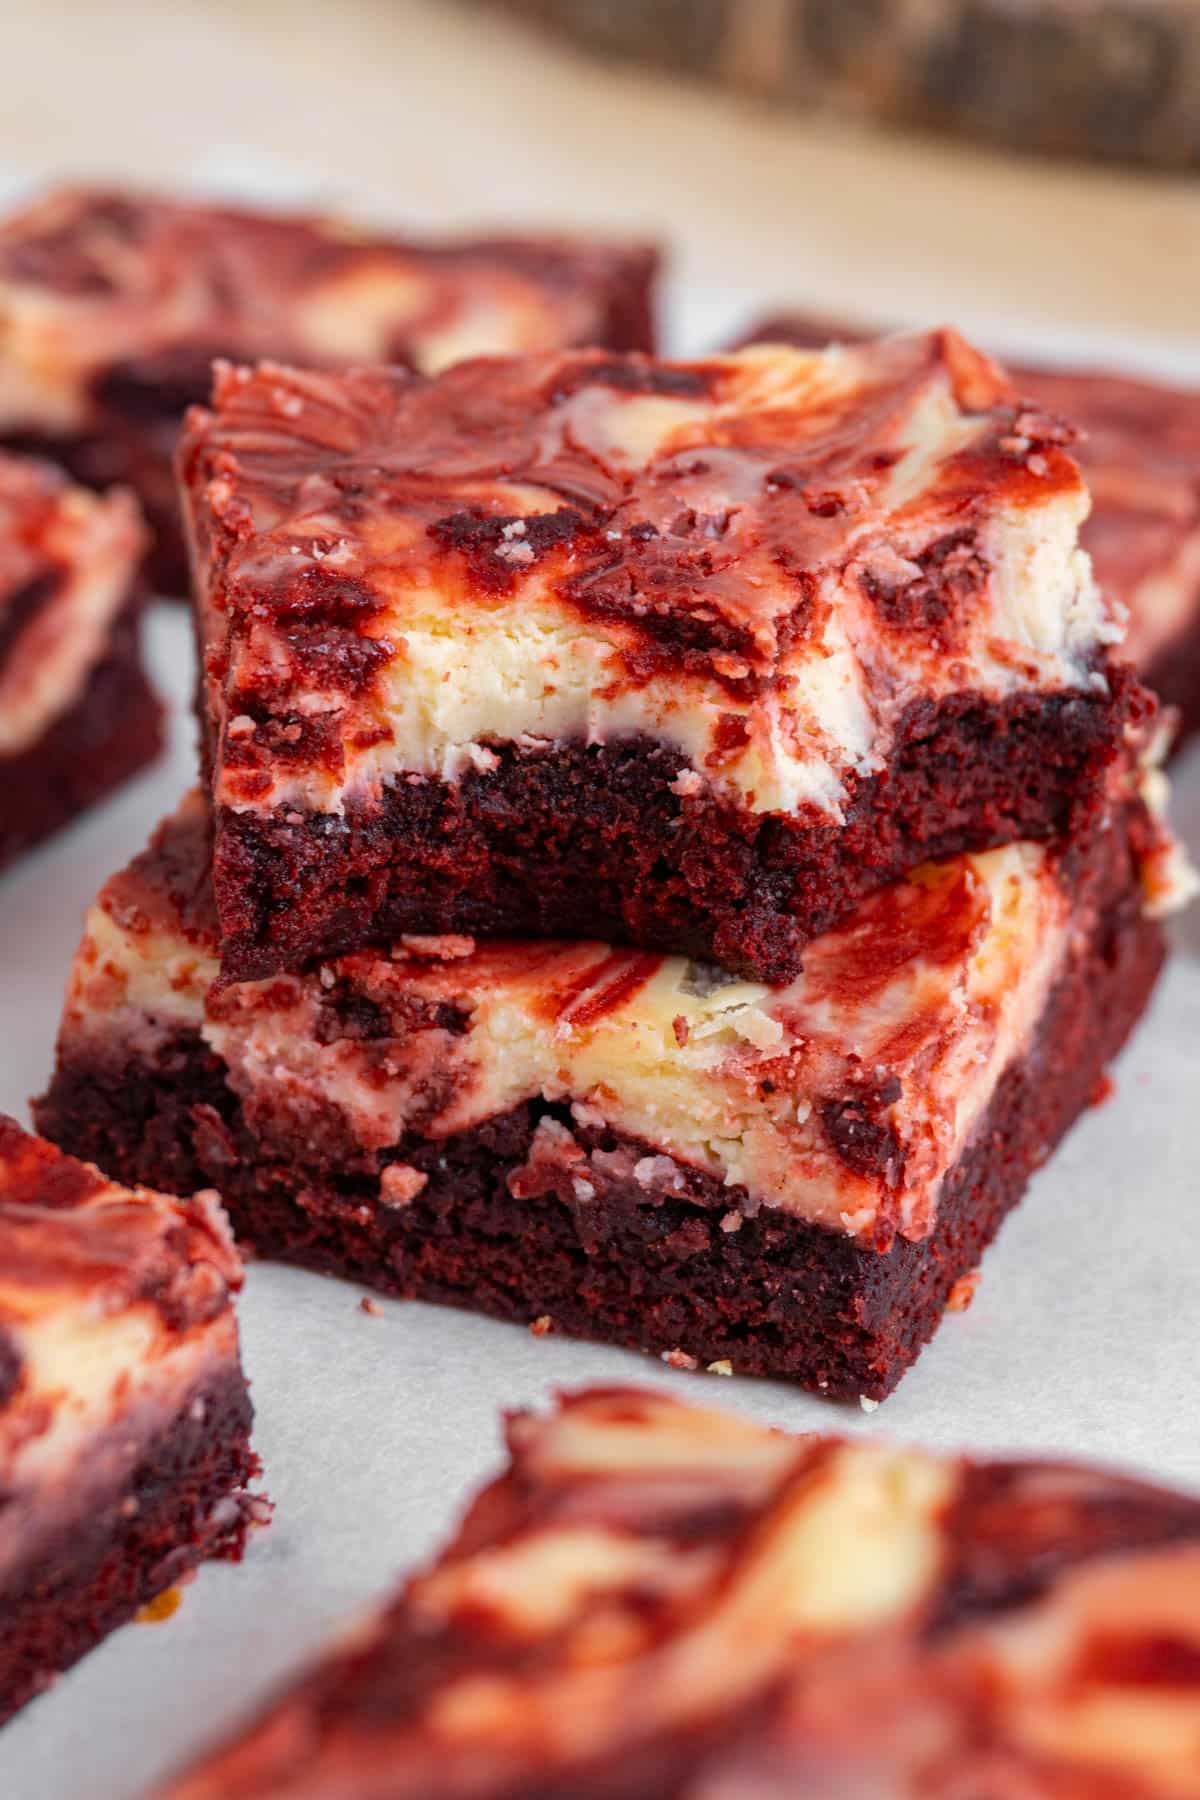
These red velvet cheesecake brownies are fudgy and decadent, with a thick cheesecake layer swirled on top. The perfect treat for Valentines!


Whether or not you're celebrating, Valentine's Day is best excuse to enjoy red velvet desserts of all kind. These Red Velvet Cheesecake Brownies are the perfect cross between a brownie, cheesecake, and a red velvet cake. A triple threat. And even though the recipe requires two components, they're SUPER easy to make!
The light chocolate flavour, mixed with the vanilla and the slightly tart cheesecake layer, all come together to make these amazing cheesecake red velvet brownies.
And if you like this recipe, I KNOW you'll enjoy these Stuffed Red Velvet Cookies, these Fudgy Brownie Cookies and these Stuffed Carrot Cake Cookies!
Jump to:
Ingredients
See recipe card below for quantities.
- Unsalted butter
- Natural unsweetened cocoa powder
- Large eggs
- White granulated sugar
- Gel red food colour
- White vinegar
- Vanilla extract
- Salt
- All-purpose flour
- Full-fat cream cheese
- Egg yolk
Instructions
There's two parts to this recipe: the cheesecake layer and the brownie layer. Let's start out making the cheesecake layer! Don't forget to preheat the oven to 350F.
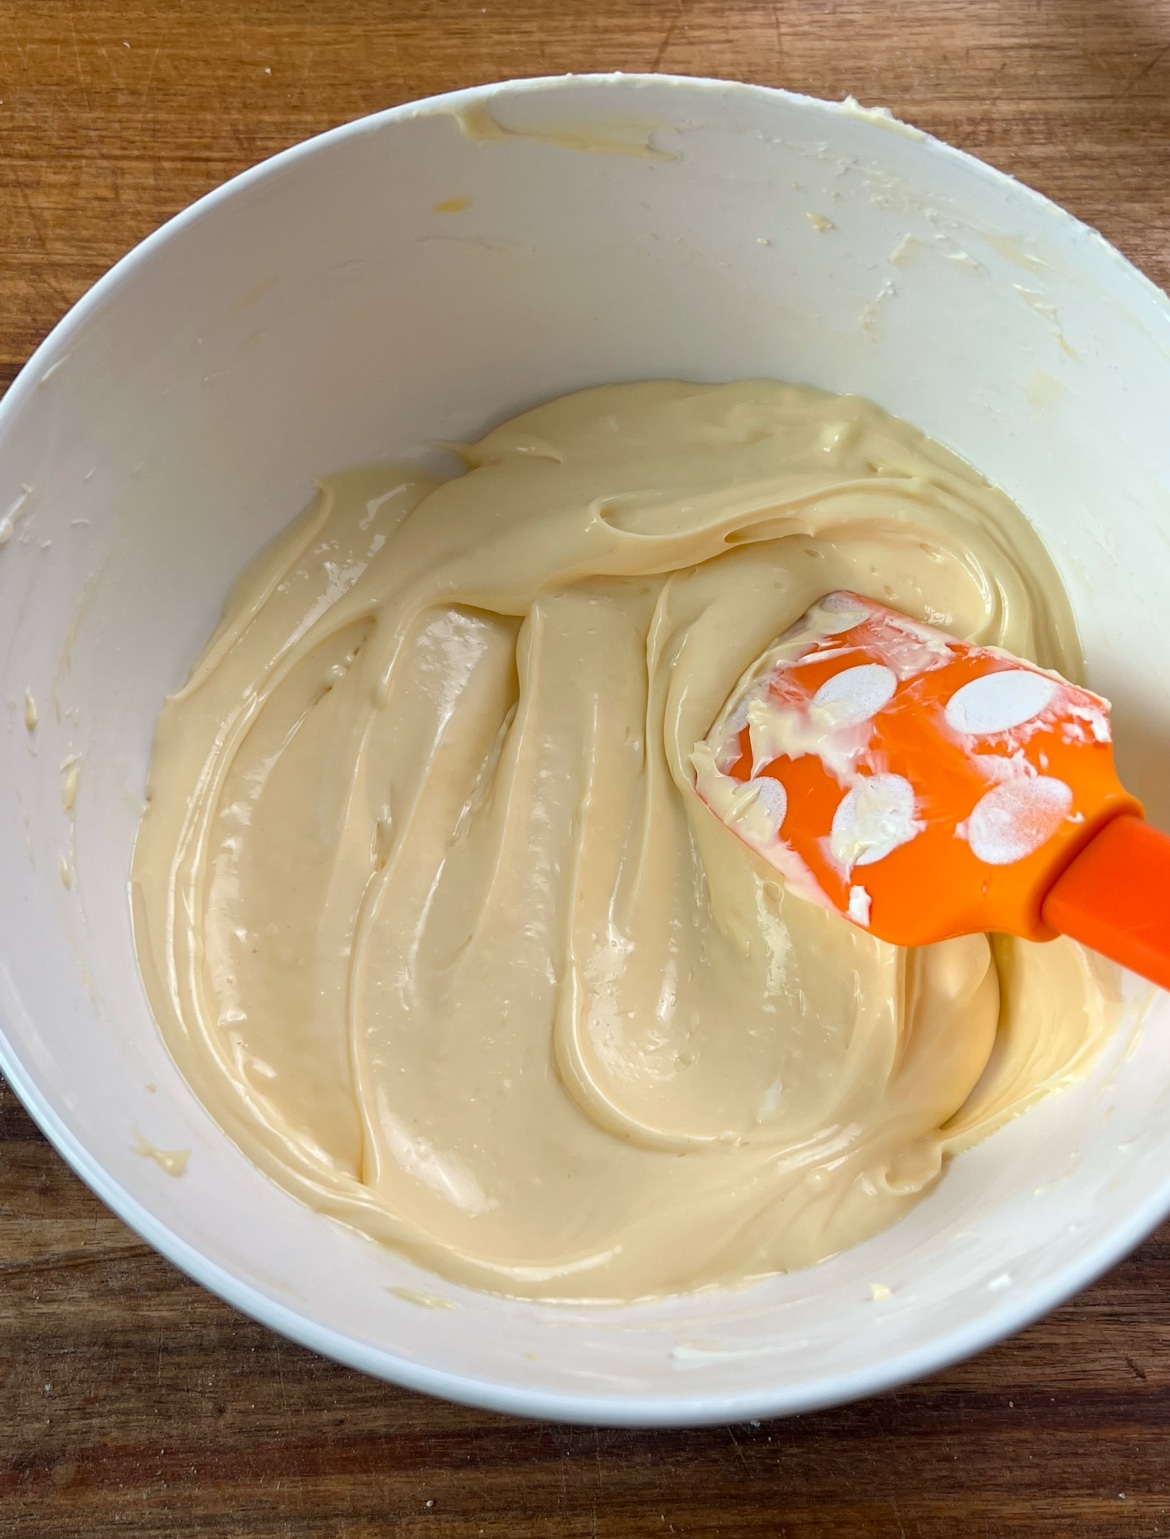
- Beat together the cream cheese, sugar until smooth. Mix in the egg yolk, vanilla and salt and set this aside.
- In another bowl, melt the butter and mix in the cocoa powder until smooth.
- In a separate bowl, beat together the eggs and sugar until the sugar is dissolved. Add in the food colour and vanilla.
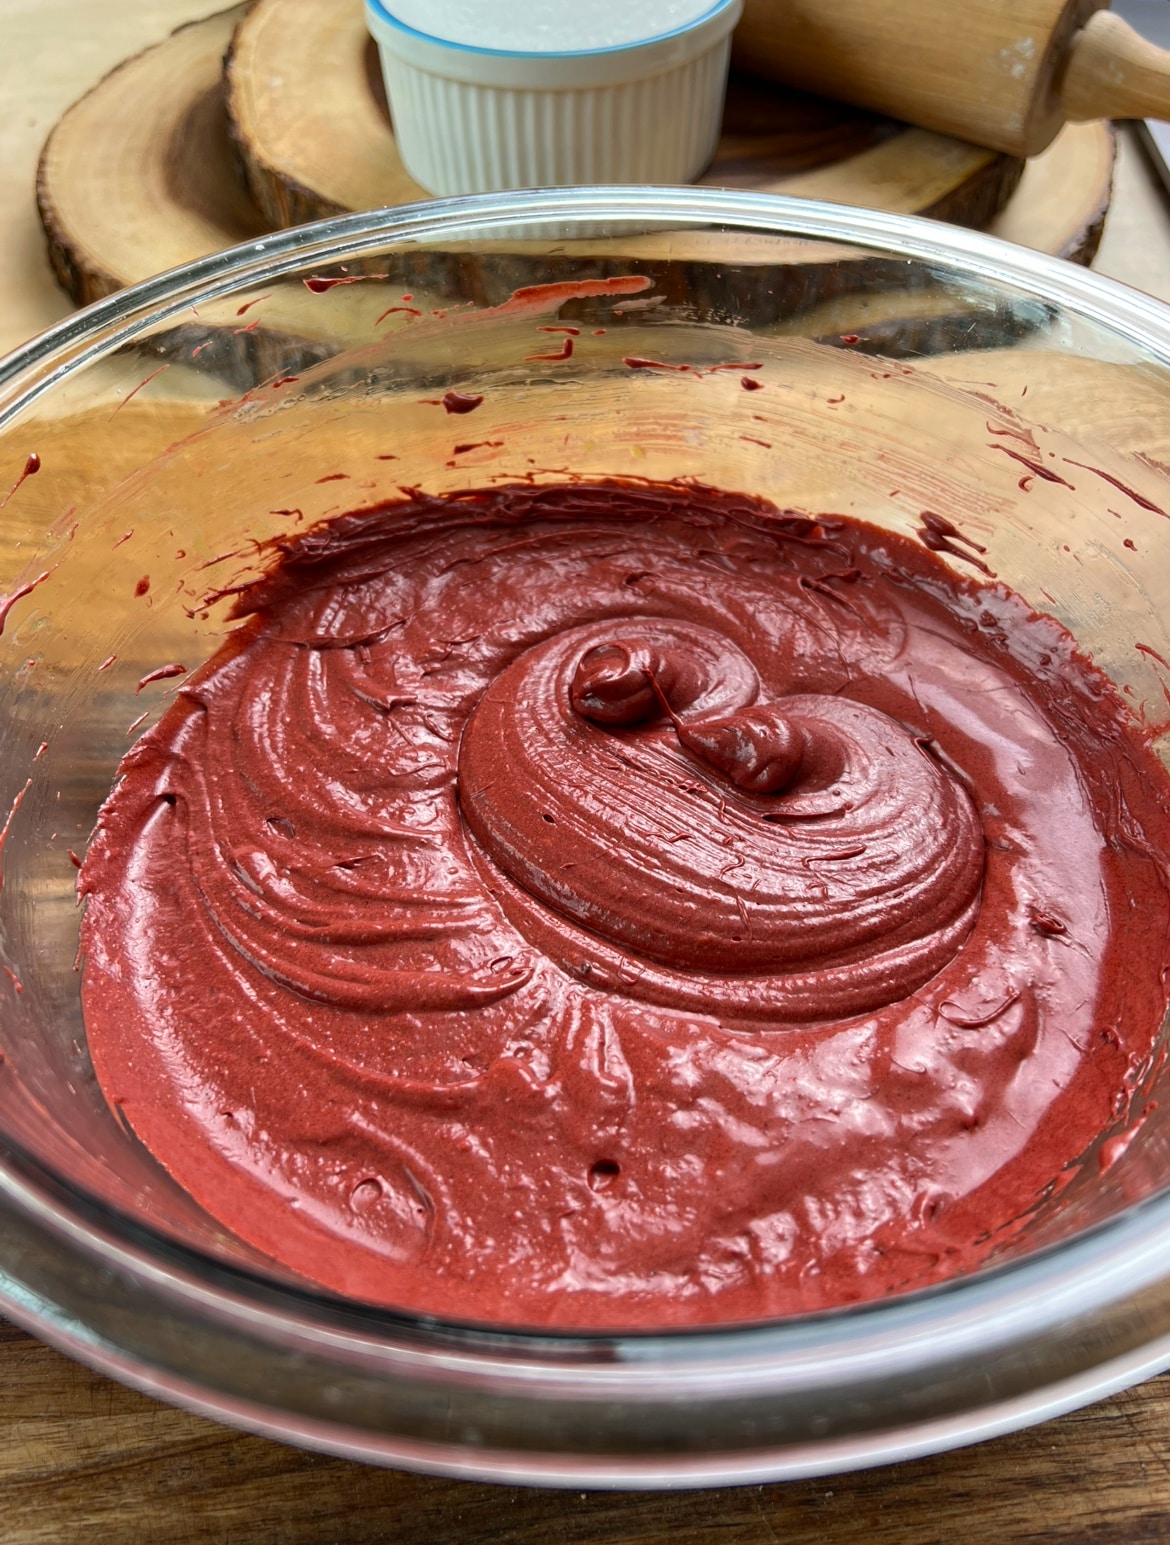
- Add the butter and cocoa powder mixture to the eggs and whisk to combine. Add in the vinegar.
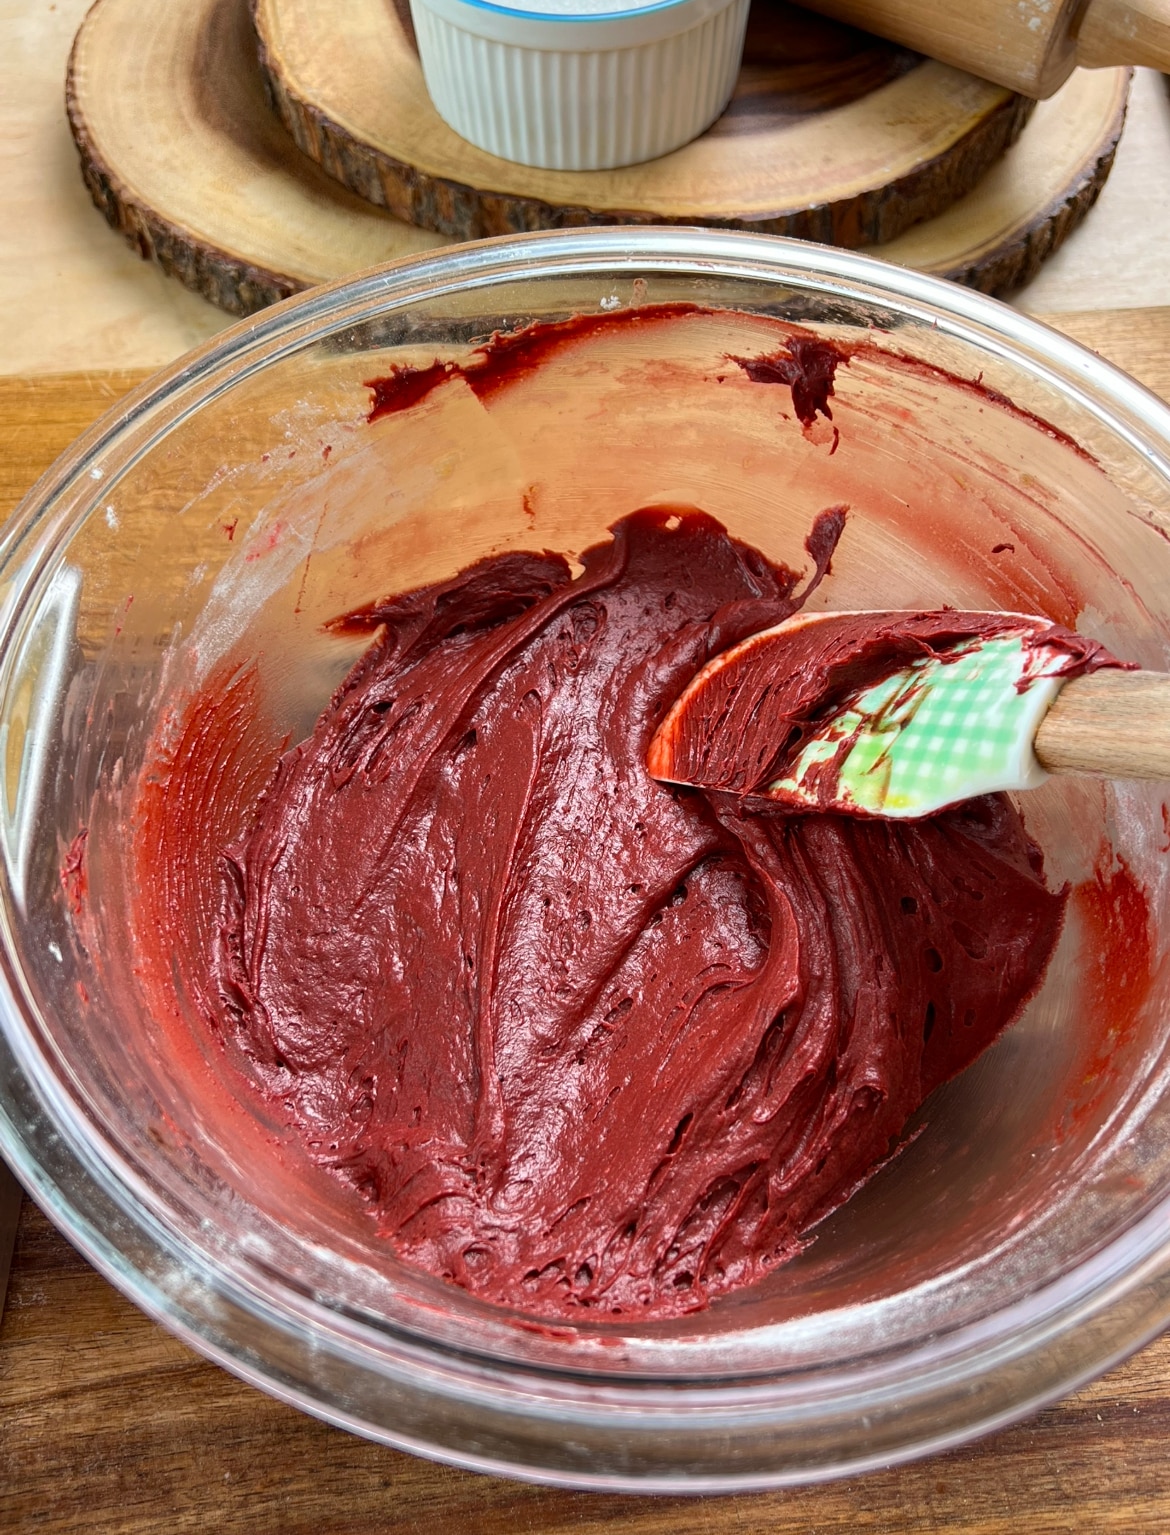
- Gently fold in the flour, making sure not to over-mix. Stop mixing once there's no more streaks of flour left.
- Spread the brownie mixture in a lined 8x8 pan. Leave a little bit aside to swirl on top.
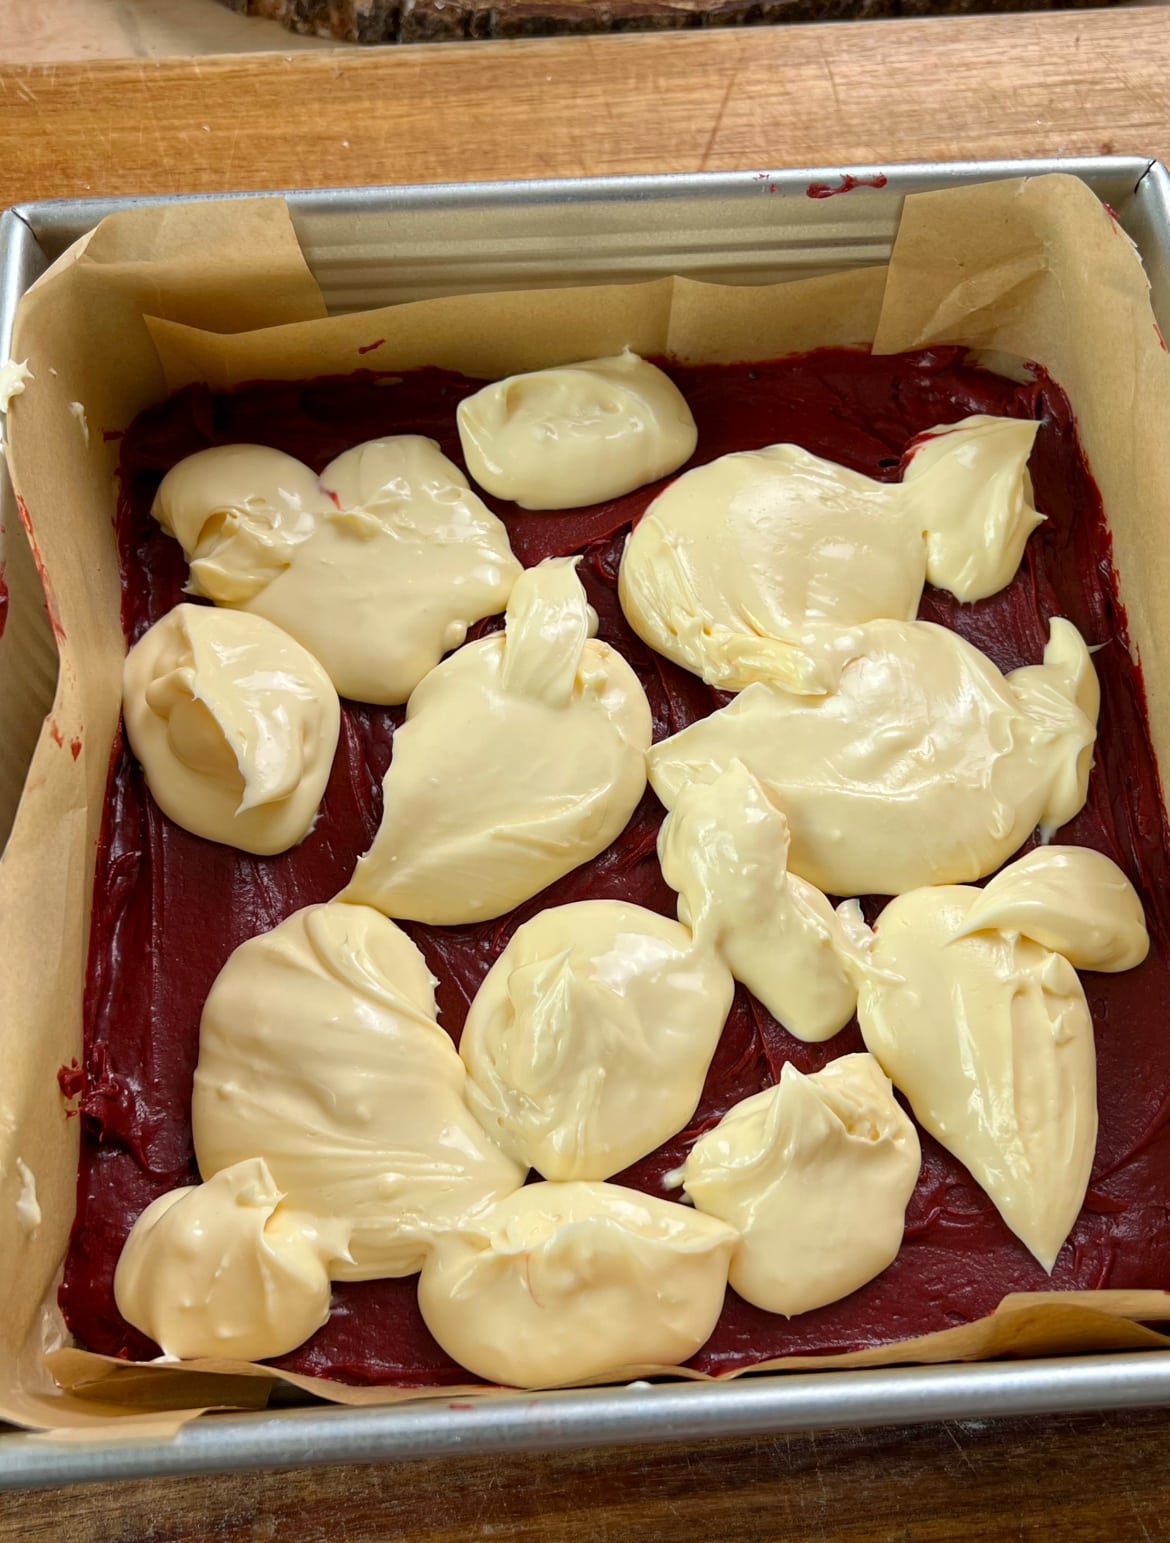
- Pour the cream cheese mixture on the surface and smooth out.
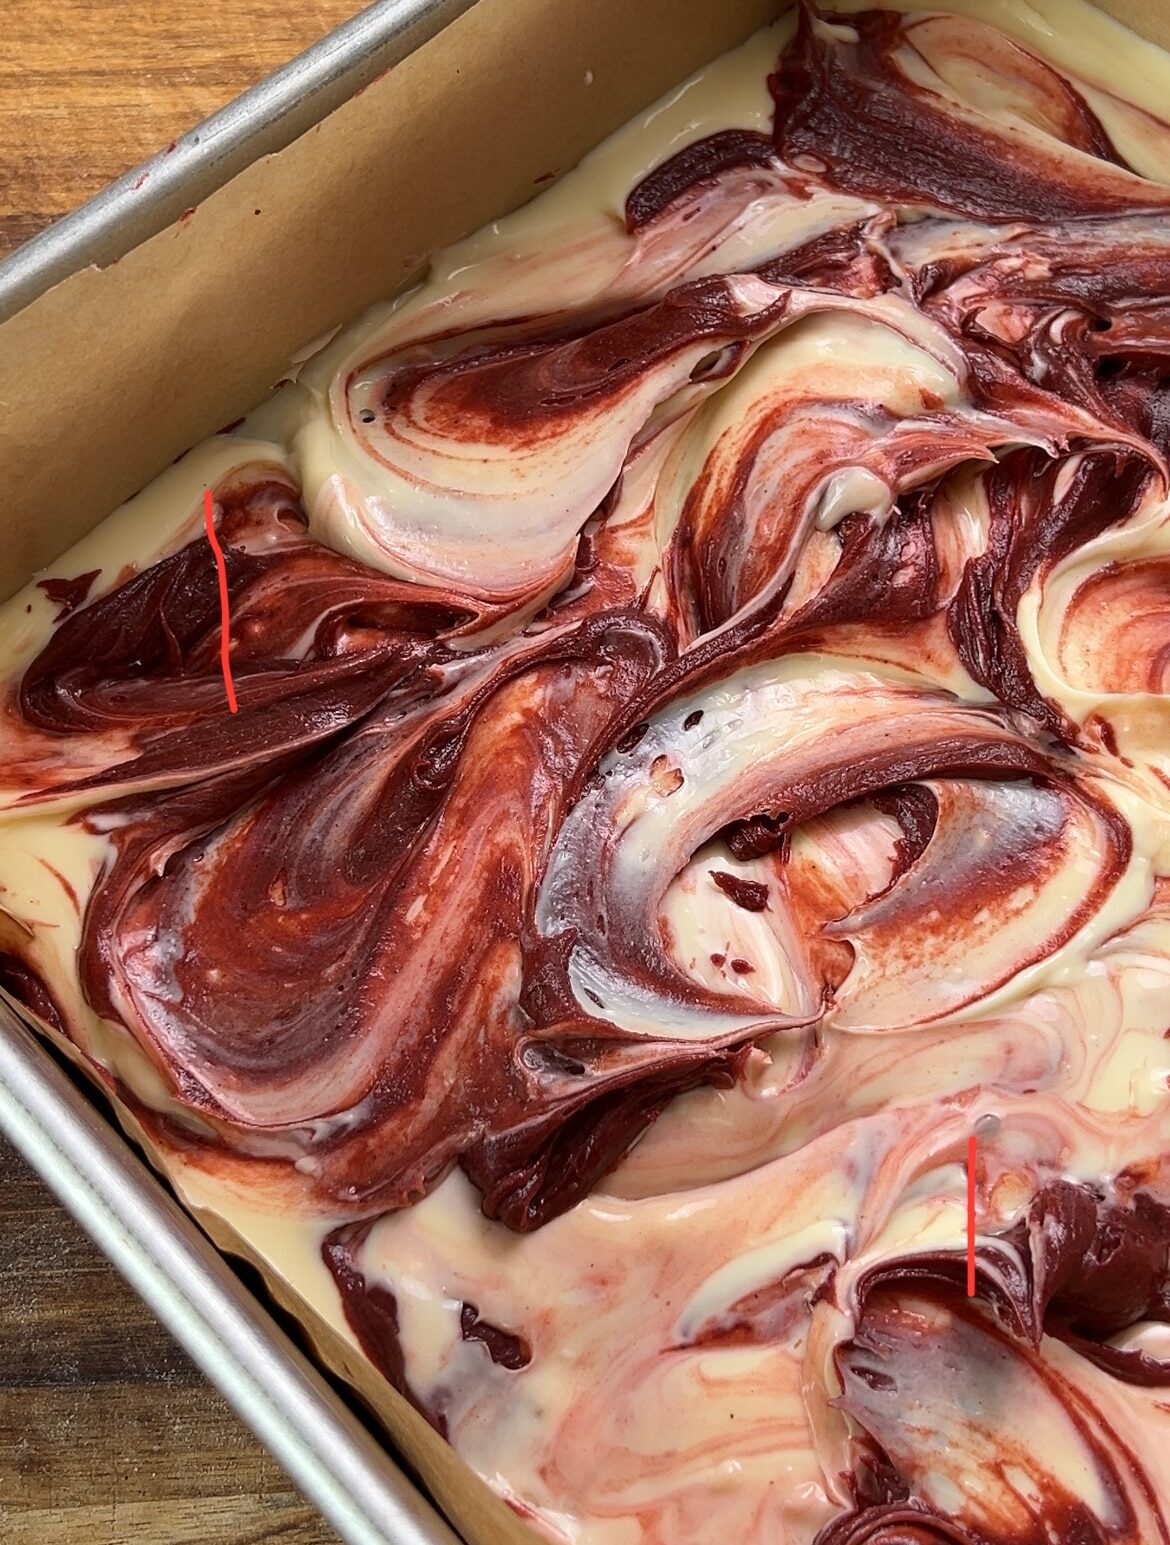
- Put a few dollops of the leftover brownie mixture and swirl the mixture with a knife or an offset spatula to create pretty swirls.
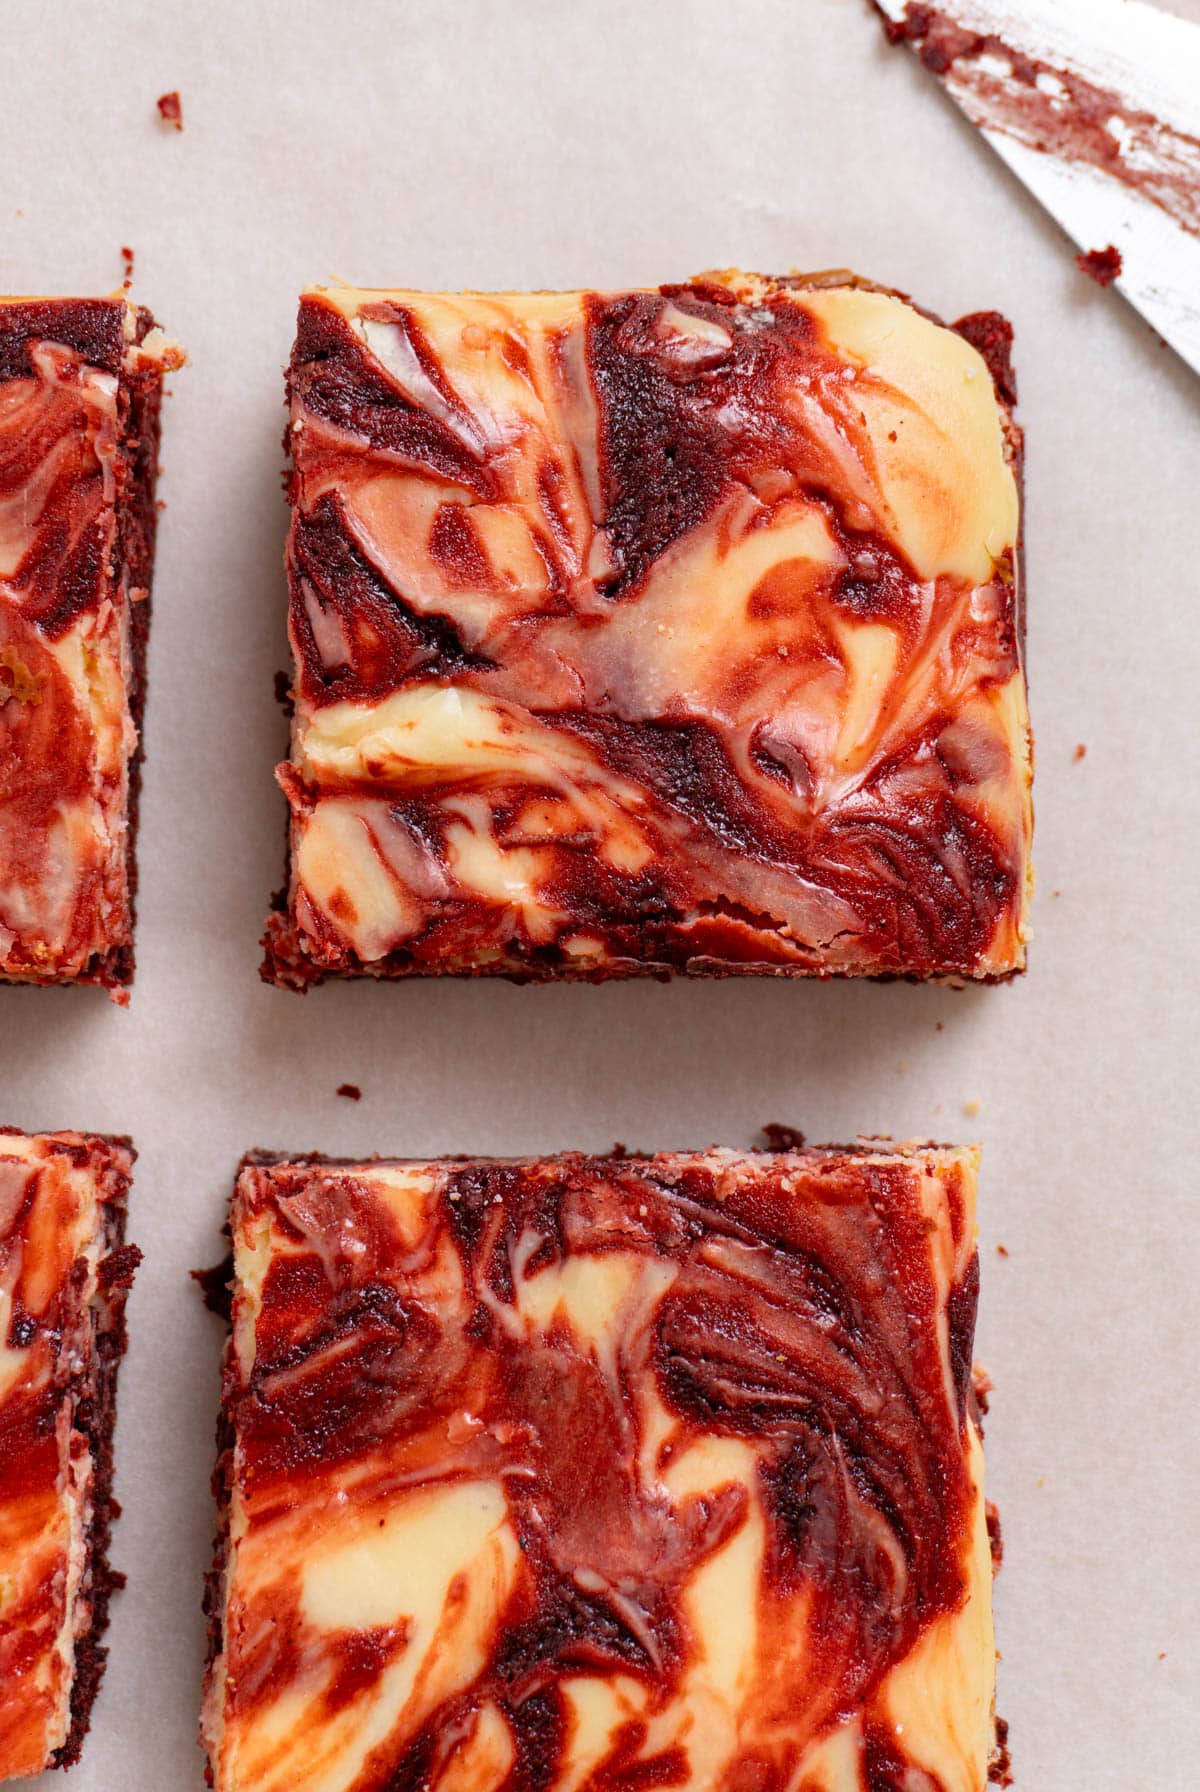
- Bake for 30-33 minutes or until the a toothpick inserted comes out with a few crumbs. Let it cool and place in the fridge for about 2 hours to set and for best results.
Hint: To be able to easily spread the cheesecake layer on top of the brownie layer, put the cheesecake mixture in dollops and smooth out.
Storing these red velvet cheesecake brownies
Let the brownies cool completely and place in an airtight container. Store in the fridge for up to a week.
Top tips to make this recipe
- Spread the cheesecake layer: To be able to easily spread the cheesecake layer on top of the brownie layer, put the cheesecake mixture in dollops and smooth out.
- Beating the sugar and eggs: To test whether the sugar is properly dissolved - feel the mixture between two fingers, it shouldn't be grainy. Just a tad little bit.
- Room temperature ingredients: Having the ingredients at room temperature helps everything incorporate together easily, making the final product evenly textured. And especially for the cream cheese, it helps blend it smoothly without lumps.
- Don't overmix: Once the red velvet brownie batter is just combined and there aren't anymore flour streaks, stop mixing. Too much mixing will make the brownies cakier.
- Watch the Baking Time: Bake until the brownie is set and a toothpick inserted in the middle comes out with a few crumbs. You don't want the toothpick to be clean because that means the brownie won't be as fudgy. It'll be on the drier side, a bit cakey. Around 30 minutes works for me, but it might vary with your oven.
FAQ
Yes! The colour won't be red but more of a slightly reddish brown. The chemical reaction between the vinegar and cocoa powder adds a reddish colour. This won't affect the taste, just the visuals.
Unfortunately, I haven't made or tested this recipe without eggs so I cannot say for certain if egg substitutes work.
Related
Looking for other recipes like this? Try these:


Red Velvet Cheesecake Brownies
Ingredients
- ½ cup - unsalted butter, melted (114g)
- ¼ cup - cocoa powder (22g)
- ¾ cup + 2 tablespoon - white granulated sugar (175g)
- 2 - large eggs
- ½ teaspoon - vanilla extract
- ½ teaspoon - salt
- ½ teaspoon - red gel food colouring
- 1 teaspoon - vinegar
- ⅔ cup - all-purpose flour (92g)
Cheesecake Swirl
- 250 g - 1 package cream cheese, room temp
- 3 tablespoon - white granulated sugar (37g)
- 1 - large egg yolk
- pinch - salt
- ¼ teaspoon - vanilla extract
Instructions
- Preheat oven to 350℉.
- In medium sized bowl, beat together the cream cheese and sugar until smooth.250 g - 1 package cream cheese, room temp, 3 tablespoon - white granulated sugar
- Add the egg yolk, vanilla and salt. Mix until combined. Set this aside.1 - large egg yolk, pinch - salt, ¼ teaspoon - vanilla extract
- Melt the butter and add cocoa powder while it's still warm.½ cup - unsalted butter, melted, ¼ cup - cocoa powder
- In another bowl, beat together the eggs and sugar with an electric mixture for 3-5 minutes, until the sugar is dissolved. Feel the mixture between two fingers, it shouldn't be grainy.2 - large eggs, ¾ cup + 2 tablespoon - white granulated sugar
- Mix in the food colour and vanilla.½ teaspoon - red gel food colouring, ½ teaspoon - vanilla extract
- Add the butter and cocoa mixture to the eggs, and the vinegar and beat until combined.1 teaspoon - vinegar
- Add the flour, salt and gently mix with spatula. Make sure to not overmix - stop when there's no streaks of flour left. Set this aside.⅔ cup - all-purpose flour, ½ teaspoon - salt
- In a 8x8 square baking pan lined with parchment paper, pour in the brownie mixture and leave a little bit to the side. Smooth that out.
- Pour over the cream cheese mixture and smooth it out. Put a few dollops of the leftover brownie mixture and swirl the mixture with a knife or an offset spatula to create pretty swirls.
- Bake for 30-33 minutes or until the a toothpick inserted comes out with a few crumbs.
- Let it cool and then refrigerate for at least 2 hours for best results
- Cut into 9 squares and enjoy!


Tanuja Ali says
Haven’t tried any recipe yet but they sure look delicious, can’t wait to try them
Iqra Sarwar says
Can I bake it as a cake? What changes should I make?