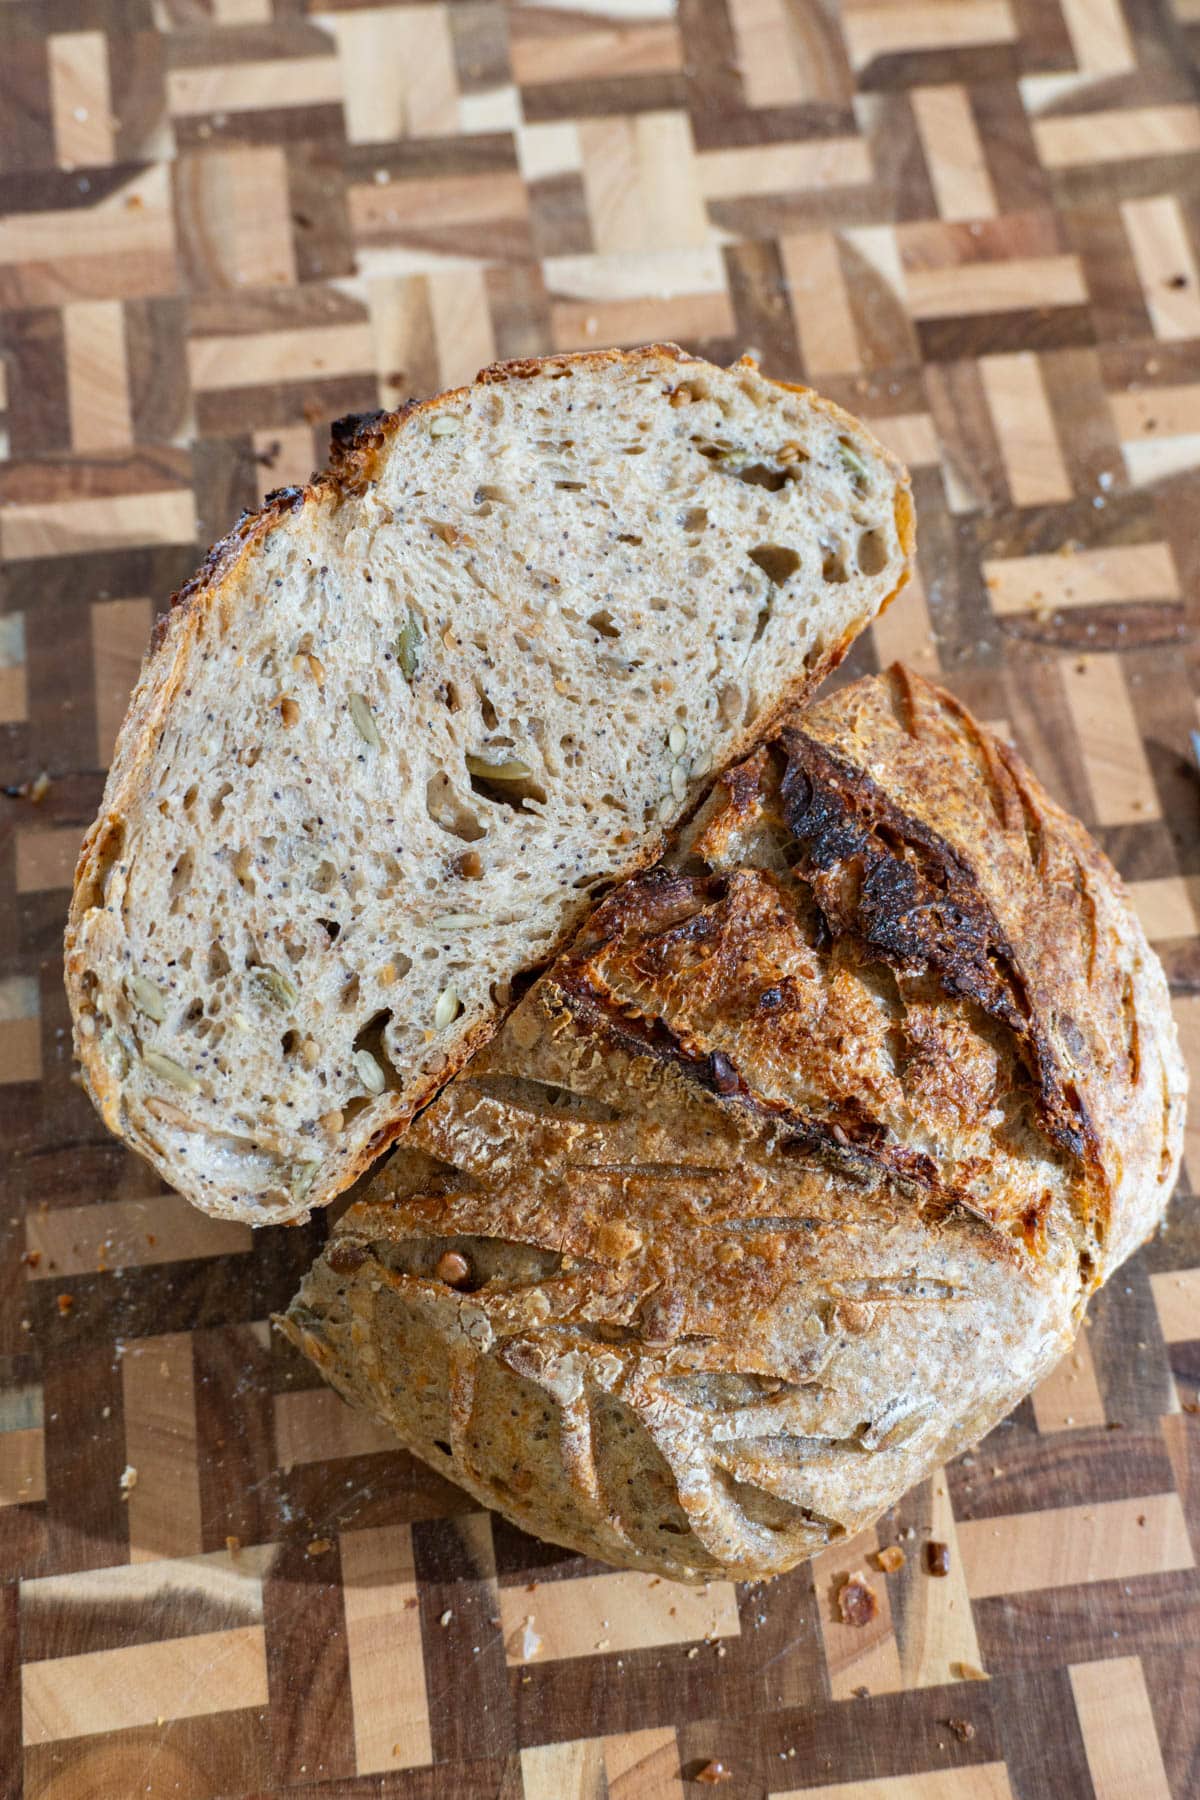
You want to make sourdough bread but don't know how to go about it? Well let's get started! This loaf is filled with seeds, BUT you can make it without them if you'd like.

My go-to sourdough bread to make is a seeded loaf. Just filled with seeds. I think it adds such an amazing flavour (as well as more fiber!) and I've made my family come to like it as well. But you can absolutely just skip them and it'll come out just as good.

This is the method I use to make mine and it's a bit more technical, but I prefer the accuracy and it can be helpful for beginners who don't know what it's supposed to look like at different stages. And once you get the hang of it, go ham and do whatever you like!
If you like this recipe, check out these amazing Sourdough Bagels, these Italian Donuts (Bomboloni) and these Dutch Cinnamon Rolls!
Jump to:
Ingredients
Scroll down to see the recipe card down BELOW for quantities.
- Whole wheat flour
- Water
- Sourdough starter
- Rye flour
- Bread flour - you need high protein flour. If you live in Canada, our all-purpose flour has the same protein content as high protein flour you find in the USA.
- Pumpkin seeds
- Sunflower seeds
- Sesame seeds
- Salt
Dough Temperature & Rise
This chart by The Sourdough Journey is really helpful in figuring out rising time and level, depending on the temperature of the dough. You can check out the link to read about this in depth!

In short, the warmer the dough temperature, the faster it ferments and rises. This fermentation continues as you shape and handle the dough and even a few hours into when you put it into the fridge to cold proof. Just because you placed it in the fridge, doesn't mean it immediately stops rising. The dough is still warm, so it continues to ferment.
If you let the dough rise until doubled, the time where it's shaped and the loaf is in the fridge to cold proof, it's still continuing to ferment and will result in an over proofed loaf.
My dough temperature was around 23C and I aimed for a 55% rise. It was at the 900mL mark on my container and after the 55% rise, it was around 1395mL.
After it's risen to your desired rise, just shape into a loaf and into the fridge to cold proof overnight!
Baking without Dutch Oven
You've probably seen people baking sourdough in a pot, which is called a Dutch Oven.
If you don't have one, don't worry. You can use a baking tray or pizza stone if you don't have one.
The reason why Dutch Ovens are used is because the lid helps lock in the steam which escapes the bread as it is baking. This steam environment is essential to getting the bread to rise because it prevents the crust from cooking and hardening before the loaf has a chance to actually rise and get bigger.
The way to achieve this without a Dutch Oven, is to create a steamy environment.
- Place a pan on a rack underneath the pizza stone. Heat up the oven at 475F for 30 minutes to an hour to heat up the pizza stone and the pan.
- Bring 2 cups of water to a boil - in a pan or a kettle
- Turn the loaf out onto a large parchment paper or a flour/semolina dusted work surface
- Using a sharp blade/lame/or serrated knife, score a long line down the length of the loaf at a 45° angle.
- Mist the surface of the loaf with a spray bottle.
- Use a pizza peel to lift the loaf and transfer to the hot pizza stone. Or if using parchment paper, lift it and place it onto the pizza stone.
- As soon as you put the loaf in the oven, pour boiling water into the pan. Make sure to wear oven mitts because the steam WILL burn you. Also place a towel on the oven glass to prevent water getting on it, which may cause it to shatter.
- Close the oven door to lock in the steam. Turn the heat down to 450F
- Bake the loaf with the steam for 25 minutes.
- After 25 minutes, remove the water pan and turn the loaf 180° and continue baking for another 20-25 minutes. If it's getting dark too fast, place a large piece of aluminum foil on top of the loaf.
The loaf should sound hollow once baked. Place on a cooling rack
Let it cool for 2-3 hours before cutting into it.
Equipment
I recommend using a dutch oven to make the bread because it makes the process very simple. I use this one from Caraway currently.
If doing an open bake, I suggest using a pizza stone such as this, or a baking sheet like this one.
Storage
Let the loaf cool down completely and store in an airtight bag or container for 1-3 days. It will go stale if left longer.
I like to slice it up and freeze it in an airtight, freezer-safe bag for up to 1-2 months. When ready to eat, place in the toaster/oven or pan and heat it up! Very simple, very easy. Storing this way keeps it fresh for longer.
My tips to make better sourdough bread
- Use an active starter:
- Window pane test:
- Rice flour in banneton:
Related
Looking for other recipes like this? Try these:


Seeded Sourdough Bread
Ingredients
- 120 g whole wheat flour
- 432 g water
- 125 g sourdough starter
- 60 g rye flour
- 420 g bread flour
- 40 g pumpkin seeds
- 50 g sunflower seeds
- 30 g sesame seeds
- 15 g salt
Instructions
- Mix the water and starter in a large bowl with a fork or whisk until well combined.432 g water, 125 g sourdough starter
- Add in all 3 flours, the seeds and salt. Mix with a fork or a dough whisk. You don't need to make it smooth. Just enough so there aren't any dry spots of flour. Cover it and let it rest for 30 minutes.120 g whole wheat flour, 60 g rye flour, 420 g bread flour, 40 g pumpkin seeds, 50 g sunflower seeds, 30 g sesame seeds, 15 g salt
- Wet your hands to perform 'Stretch & Folds'. Grab the dough from one side and slowly pull it up, stretching it. Fold it over on the opposite side. Do the stretch and fold on all 4 sides. Cover and let it rest for another 30 minutes.
- Repeat this 3-4 more times until the dough is no longer sticky (just tacky) and also passes the window pane test. Which is where you take some of the dough and stretch it out thin enough to see the light pass through, translucent.
- At this point, place the dough into a container which makes it easier to measure the rise. I used a large measuring cup. You can use any straight sided container which helps you measure the rise accurately. Mark it with a piece of tape, elastic band or marker!
- If you're baking it the same day, you can let it rise 75-80% or until nearly doubled. If not, go up to the "Dough Temperature & Rise" section to see how long to let it rise. Keep in mind that sourdough takes longer to rise compared to yeast doughs. So schedule accordingly.
- Once risen, dump the dough onto your countertop and gather and shape into a rough-round boule, which is also called pre-shaping. Let it rest for 30 minutes.
- Now take the dough and flip it over. Stretch out into a rectangle. Fold the bottom up to the middle, take one side and stretch a bit before folding to the middle and repeat with the other side. Fold the top down and then take the top corners pull them over criss-cross. Now take the top and fold it over as if you're rolling a burrito and seal the bottom.
- Make sure the seal side is down and using a bench scraper, tuck the sides into the bottom. This will help tighten up the loaf, creating surface tension.
- Place the shaped loaf bottom sides up into a floured banneton or a loaf pan covered with paper towel. I reccomend using rice flour to dust the banneton or loaf pan because it reduces the chances of the dough sticking.
- For the same day loaf, let it rest for an hour or so until it rises some more.
- For the next day loaf, cover the banneton/loaf pan with a shower cap, plastic wrap or a plastic bag. Place in the fridge overnight or for the next 8-12 hours.
- About 30-60 minutes before baking, place your dutch oven in the oven to heat up at 450F. If you don't have one, scroll up to see how to bake the sourdough without one.
- Once preheated, take out the loaf from the fridge, place a piece of parchment on top and flip it over onto the paper - bottom side down.
- Dust off any excess rice flour and use a sharp razor or knife to score it down the middle. This is important to control the expansion and to make sure it doesn't burst. You can also add light decorative scoring as well, but make sure you have one proper scored line.
- Take out the the dutch oven and place the bread into it with the parchment paper. Spray the loaf down with some water or add an ice cube on the side to help create more steam. Close the lid immediately and place in the oven. Turn down the heat to 400F.
- Bake covered for about 30 minutes and remove the lid.
- Turn the heat back up to 450F and let it bake for another 15 minutes or so to cook further, brown and crisp up.
- Take out of oven once it's crisp and browned beautifully. If you want to be precise, insert a thermometer in the middle and the internal temperature should be around 200F or higher.
- Let it cool down for 2-4 hours or even over night for the best crumb and flavour. Please practice patience and try not to cut it while it's still hot.


Leave a Reply